The tutorials build upon each other, we therefore recommend starting with Tutorial 1.
The tutorials 1-3 show how to use Tree of Knowledge to model childbearing behavior of American women. Specifically, the model determines a probability of giving birth for every woman that depends on her age, current number of children and marital status. This model can then be used to make predictions about diverse topics from the development of an individual household, to the development of American population demographics.
The tutorials 1-3 show how to use Tree of Knowledge to model childbearing behavior of American women. Specifically, the model determines a probability of giving birth for every woman that depends on her age, current number of children and marital status. This model can then be used to make predictions about diverse topics from the development of an individual household, to the development of American population demographics.
Setup
To do the tutorials you need download this GitHub repository.
You can do this with the following steps:
You can do this with the following steps:
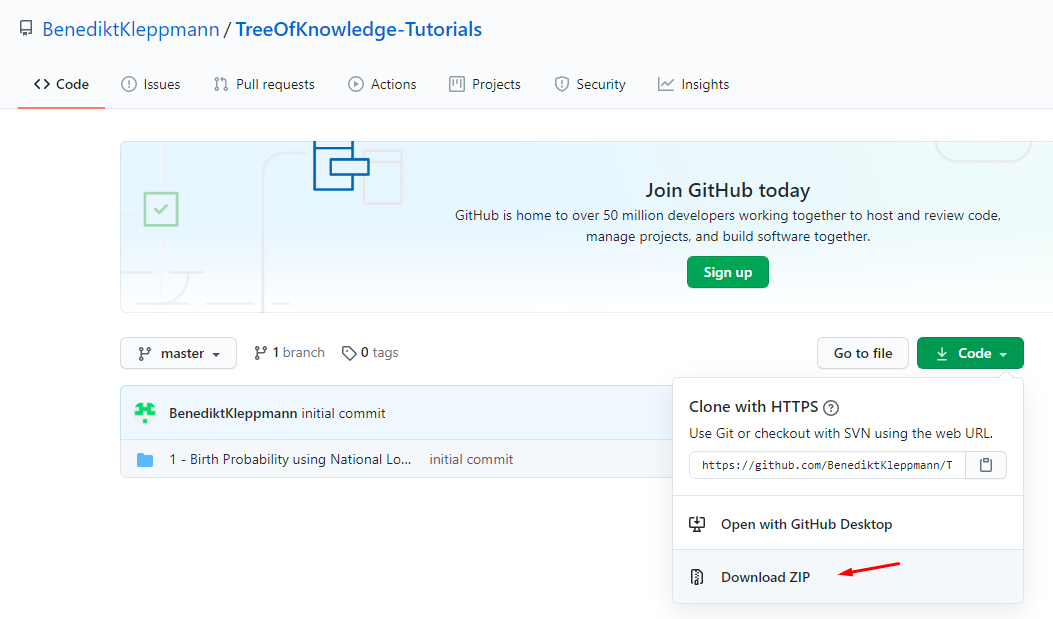
- in your browser navigate to https://github.com/BenediktKleppmann/TreeOfKnowledge-Tutorials
- click on "Code" and then on "Download ZIP" - see Image below
- unzip the downloaded file into a folder of your choice
The Data
Tree of Knowledge can not only simulate the behavior of complex agents, but it can also learn that behavior from a wide range of datasets.
Therefore, the first step is often to upload a dataset that relates to behavior of interest - here childbearing. As we will see later, Tree of Knowledge is able to learn from practically any dataset for whose generation the phenomenon of interest (here: childbearing) played a role.
About the Data
One of the big innovations of Tree of Knowledge is that it can learn object behaviors from more than one dataset. In this tutorial we will use two datasets to learn the childbearing behavior:
-
National Longitudinal Survey of Youth 1979
This dataset tracks the lives of 6 111 Americans.
In 1979, 6 111 youths were selected such that their distribution of ethnicity and sex corresponds that of America as a whole. In 1979, the participants completed a survey with many questions about their current situation (e.g. family situation, profession, etc.). They repeated the same survey every 1-2 years until 2016. The survey data therefore allows us to track their development throughout their lives. For more information on the data, please refer to https://www.nlsinfo.org/content/cohorts/nlsy79.
One of the questions in the survey asked the participants about the number of biological children they have. By tracking the number of biological children we can learn about their childbearing behavior.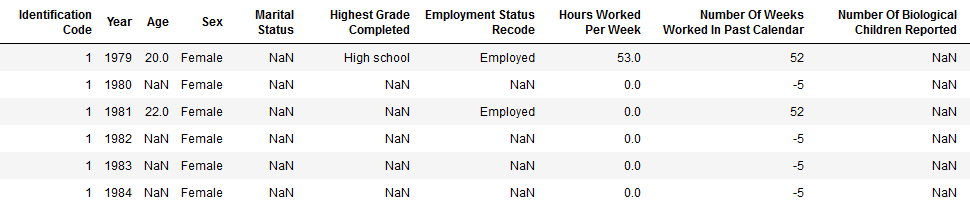
-
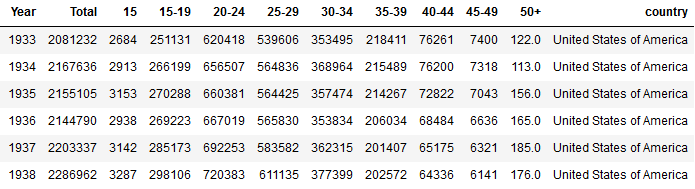
Number of births by age of mother
As you can see in the table below, this dataset contains the total number of births occurring in America every year. In the other columns, the total number is split up by age segments of the mother.
This table allows us to learn about childbearing, because the age in which women choose to have their children affects the distribution across these age segments.
For now we will focus on the fist dataset ('National Longitudinal Survey of Youth 1979'). The second dataset ('Number of births by age of mother') won't play a role until Tutorial 3.
Preprocessing of the Data
The raw National-Longitudinal-Survey-data is not legible, as both columns and data values are encoded. The preprocessing decoded these values.
The exact details of the preprocessing are described in a Jupyter Notebook from the GitHub repository '1 - Birth Probability using National Longitudinal Survey of Youth/prepare_data.ipynb'. We will however work directly with the preprocessed file which is located at '1 - Birth Probability using National Longitudinal Survey of Youth/national_longitudinal_survey_of_youth_1979.csv'.
Upload the Data
The Data uploading consists of 6 steps. During these steps various details about the origin and the form of the data are specified.
These specifications are needed for the data to be integrated with previously uploaded data in Tree of Knowledge's central knowledge base. Once in the knowledge base the data can be easily used for a large range of different tasks.
It is essential to be diligent when doing the uploading, so that the data will be integrated correctly.
Log in
- In your browser, open the website www.treeofknowledge.ai
- Click on "Sign up" (in the top right corner), enter your details and press "Submit". You will be redirected to the main menu.
- On the main menu, click the box that says "Upload Data".
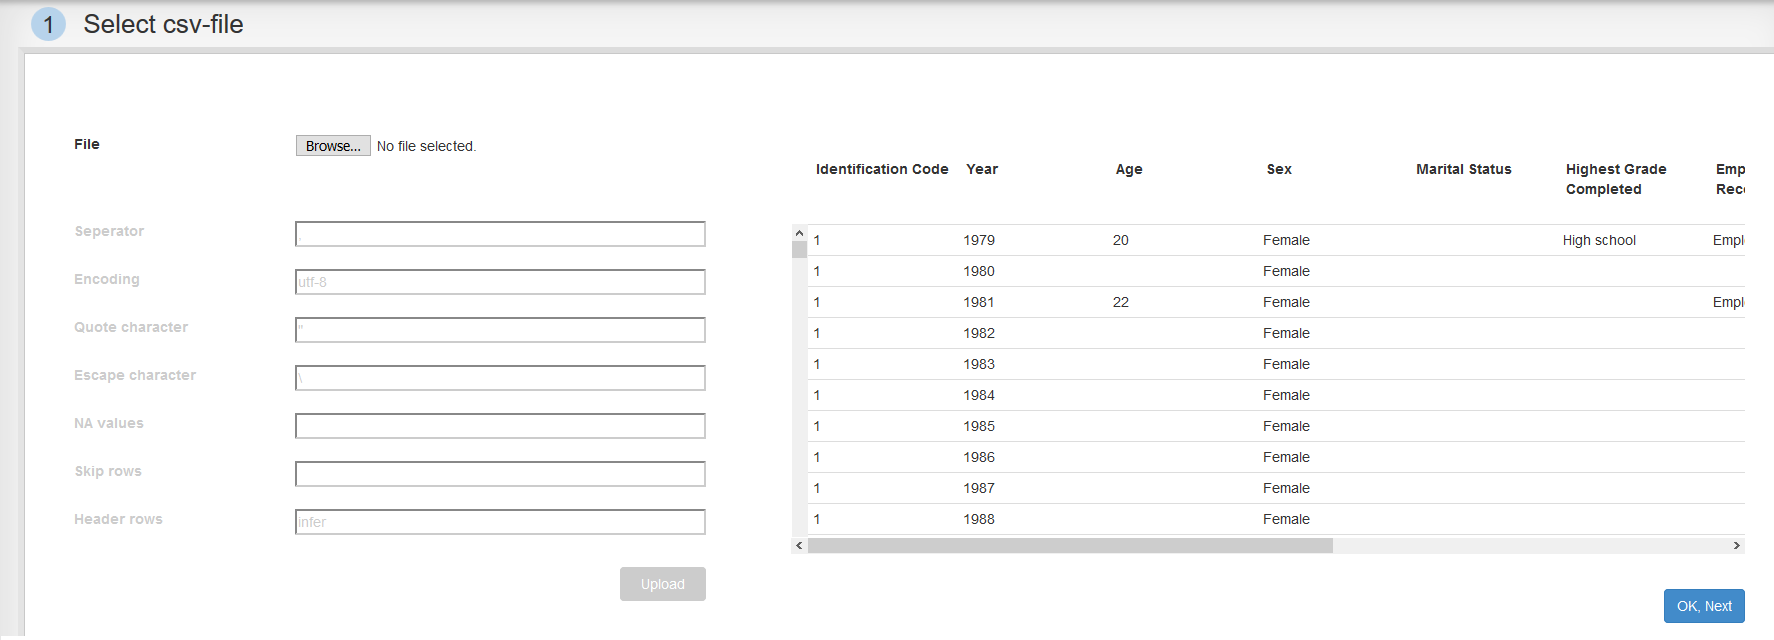
Step 1: Select csv-file
- Click on "Choose File".
- Navigate to the file "1 - Birth Probability using National Longitudinal Survey of Youth/national_longitudinal_survey_of_youth_1979.csv" and open it.
- press "Upload".
- Once the table has loaded, we check if it was loaded correctly and then press "OK, Next".
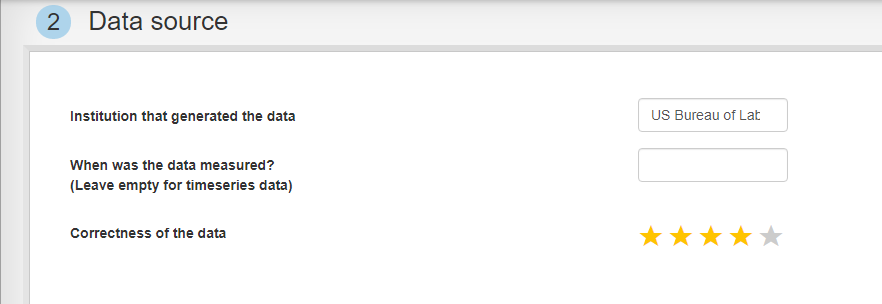
Step 2: Data source
What institution generated the data? According to , the National Longitudinal Survey is financed by the "US Bureau of Labor Statistics", so let's write that into the first field.
We leave the second field empty, because the table contains observations from many different points in time.
For 'Correctness of the data' we can guess a value. I personally believe that the US Bureau of Labor Statistics is an impartial institution, however doubt the data was checked very rigorously. Therefore I give it four stars.
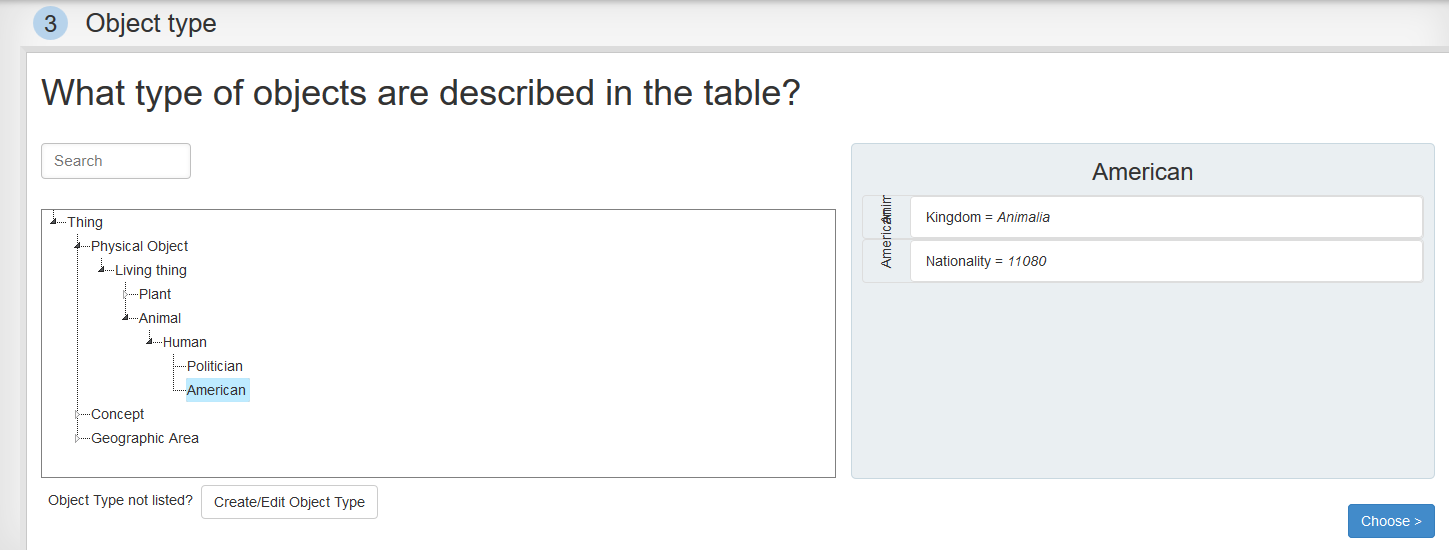
Step 3: Object type
Here we specify what type of objects are described by the data. The entities described by the data - here: the 6 111 Americans - generally belong to the same type of object - here: American.
We search for "American" or find it below in the tree and select it.
Next, we click "Choose".
Next, we click "Choose".
Step 4: Meta data
In this section we specify details of the sample. Were it a random sample from among all Americans?
It is effectively a random sample from those Americans that were youth in 1979. We specify this sampling constraint by adding the two new facts "Age > 13" and "Age < 23" with valid times from 1979-01-01 to 1980-01-01 - see the figure below.
Next, we click on "Next".

Next, we click on "Next".
Step 5: Object Attributes
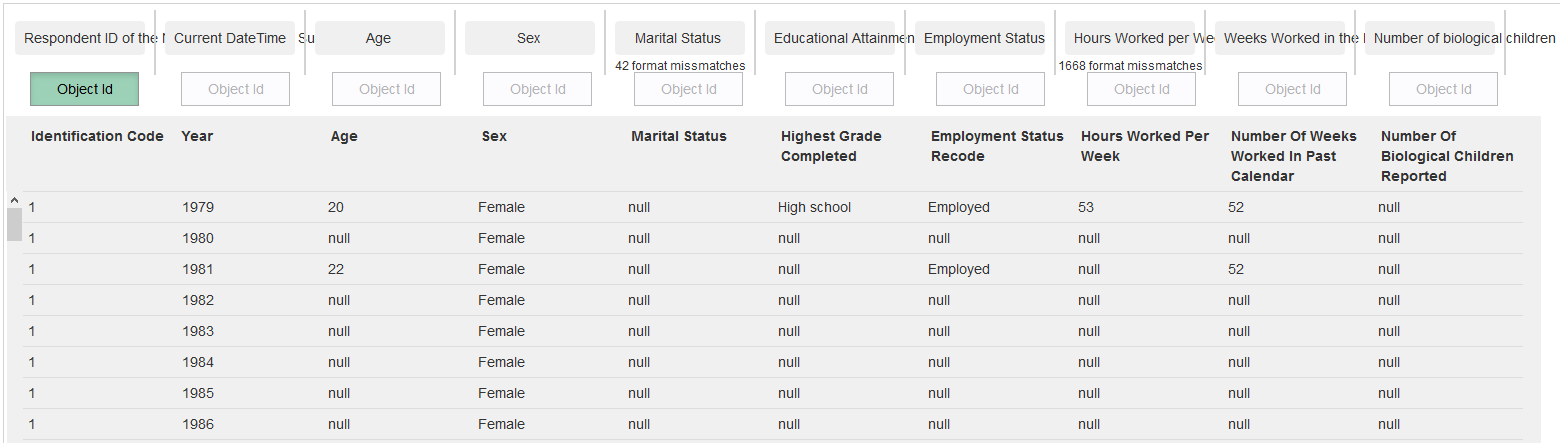
Here we label the table columns.
Above every column is a "Choose Attribute" button. Clicking on it will open an attribute-selection window, where we can specify what type of information (attribute) is in this column.
Let's specify the columns as follows:
Note: For some of the columns a little notice appears: "xxx format mismatches". This is the number of values in this column, that do not uphold the format specified by the selected column. For instance the 9th column "Weeks Worked in the last year" has to be an integer between 0 and 52. Therefore the cells containing the value -4 are marked red and counted as format mismatch.
Column 2 contains the year in which that row's data was measured. There are multiple rows containing data about the same person (identified by the Respondent ID in the first column), each row containing data from a different year. We explain this to the website by choosing the attribute "Date/Time of Observation" for column 2 and changing the field "In the table, are there multiple rows with information on the same entity?" to 'Yes'. Now a new row of buttons appeared above the table. We click the "Object Id" button above column 1 to label it as the objects identifier.
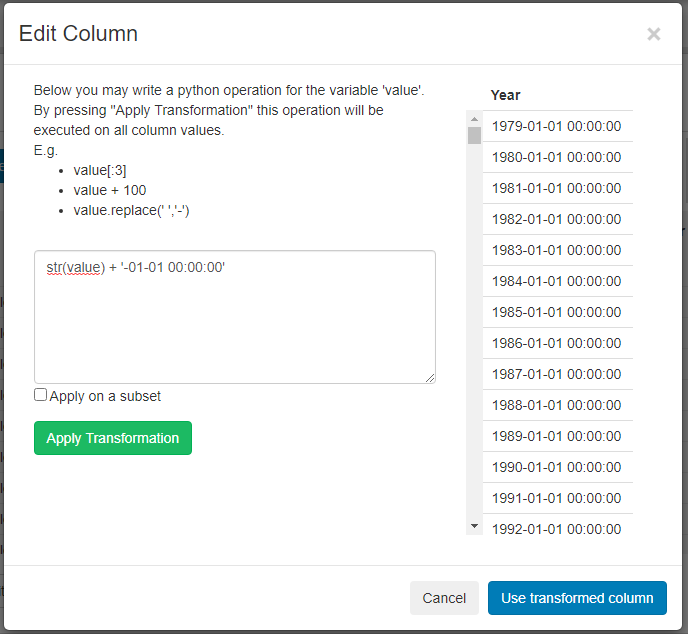
One thing remains: the "Date/Time of Observation" is supposed to not only contain the year of observation, but an exact date. To transform the second column into dates, we click on "Edit Column" button below it. In the window that opens we write the transformation "str(value) + '-01-01-01 00:00:00'" into the textarea. Then click on "Apply Transformation" and then on "Use transformed column".
Above every column is a "Choose Attribute" button. Clicking on it will open an attribute-selection window, where we can specify what type of information (attribute) is in this column.
Let's specify the columns as follows:
- column 1 -> "Respondent ID of the National Longitudinal Survey 1979"
- column 3 -> "Age"
- column 4 -> "Sex"
- column 5 -> "Marital Status"
- column 6 -> "Educational Attainment"
- column 7 -> "Employment Status"
- column 8 -> "Hours Worked per Week"
- column 9 -> "Weeks Worked in the last year"
- column 10 -> "Number of biological children"
Note: For some of the columns a little notice appears: "xxx format mismatches". This is the number of values in this column, that do not uphold the format specified by the selected column. For instance the 9th column "Weeks Worked in the last year" has to be an integer between 0 and 52. Therefore the cells containing the value -4 are marked red and counted as format mismatch.
Column 2 contains the year in which that row's data was measured. There are multiple rows containing data about the same person (identified by the Respondent ID in the first column), each row containing data from a different year. We explain this to the website by choosing the attribute "Date/Time of Observation" for column 2 and changing the field "In the table, are there multiple rows with information on the same entity?" to 'Yes'. Now a new row of buttons appeared above the table. We click the "Object Id" button above column 1 to label it as the objects identifier.
One thing remains: the "Date/Time of Observation" is supposed to not only contain the year of observation, but an exact date. To transform the second column into dates, we click on "Edit Column" button below it. In the window that opens we write the transformation "str(value) + '-01-01-01 00:00:00'" into the textarea. Then click on "Apply Transformation" and then on "Use transformed column".
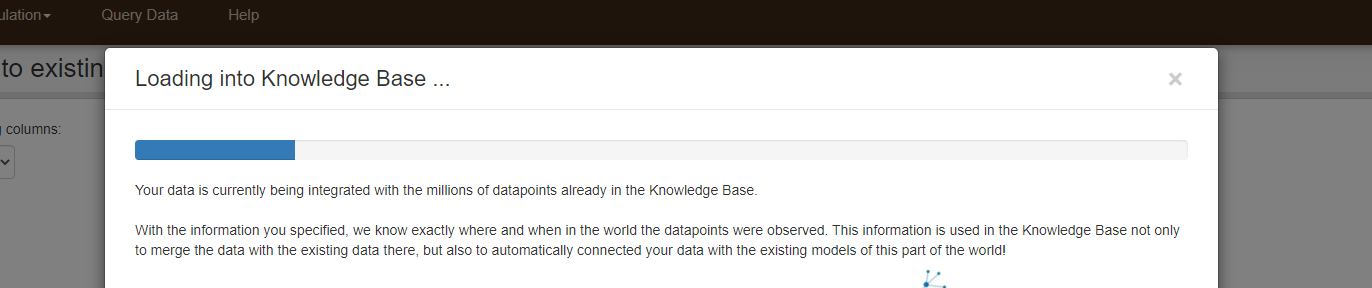
Step 6: Match to existing entities
This step would be relevant if Tree of Knowledge's knowledge base already contained data from the exact same people. The page allows us match the people from our dataset to the people already present in the knowledge base.
In our case we are however quite sure that no data about the survey participants is already in the knowledge base, also we don't know enough about them (e.g. name, social security number, etc.) to be able to reliably match them to people in the knowledge base.
We therefore skip this step by simply pressing "Upload the data!"

Well done!!
Continue with Tutorial 2 >